Ever touched a west-facing stucco wall at 4 p.m. in Indio and yanked your hand back? That heat is exactly why stucco wall prep in the Coachella Valley can’t follow a generic how-to.
Hot sun, low humidity, wind, and blowing sand change how fast water evaporates, how primers bond, and how long repairs need to cure. Prep done right gives paint something solid to grab, even when summer days push past 105°F.
Why Indio summer heat makes stucco prep trickier
Stucco is porous. It holds dust, salts, and old chalky paint. In extreme heat, water and solvents flash off fast, so products can dry on the surface before they bond into the pores.
A few local conditions to plan for:
- Wall temps run hotter than air temps. South and west exposures can be scorching by late morning.
- Wind and sand (common around open lots and wash areas) contaminate wet primer and caulk.
- Fast surface drying can fool you. Something can feel dry but still be soft underneath, especially patches and primers. Always check the product label.
If you’re considering a full repaint, it helps to understand how a proper exterior process is built for desert conditions. See our professional exterior painting services for a clear overview and to request a free estimate.
Tools and materials (what you’ll actually use)
You don’t need fancy gear, but you do need the right basics.
Cleaning and surface work
- Garden hose with spray nozzle, pump sprayer, or a pressure washer used gently
- Stiff nylon brush (not a wire brush, which can gouge)
- Mild detergent or stucco-safe cleaner
- Plastic sheeting or shade cloth to protect sections from the sun and wind
Repairs and sealing
- Acrylic elastomeric caulk for small cracks (paintable)
- Stucco patch for chips and small holes (match texture)
- Masonry bonding primer (or a primer recommended by your paint maker)
- Painter’s tape, masking paper, and drop cloths
Safety
- Eye protection, gloves, dust mask, or respirator for sanding dust
- Stable ladder and common sense around heat (hydration matters)
Set your hot-weather schedule before you start
In Indio summers, timing is part of the prep.
Best workflow
- Start at sunrise and work the east and north sides first.
- Save west-facing walls for another day, or work them very early.
- If you can’t avoid the sun, shade the wall with a canopy or shade cloth.
- Plan around wind. If it’s gusty, cleaning and priming get messy fast.
Most coatings like surface temperatures under about 90°F to 95°F for best bonding, but some products allow higher temperatures. Always follow the label, because the allowed temperature range depends on the exact primer, caulk, and paint.
Step-by-step stucco wall prep for hot weather (the durable way)
1) Inspect like a contractor, not like a shopper
Walk the perimeter of the building slowly. Mark problem areas with chalk or tape.
Look for:
- Cracks (hairline versus wider cracks)
- Hollow-sounding stucco (possible delamination)
- Efflorescence (white salt deposits)
- Chalking paint (powdery residue on your hand)
- Water stains under windows, hose bibs, and roof edges
If you find active leaks or soft stucco, pause the paint plan. Paint won’t fix moisture.
2) Clean without damaging the stucco
Cleaning removes dust and chalk that stop paint from bonding. It’s necessary, but this is where DIYers often go too hard.
Safe approach:
- Wet the wall first, then wash from bottom to top to reduce streaking.
- Scrub stained areas with a nylon brush and mild cleaner.
- Rinse thoroughly, top to bottom.
If you pressure wash, keep it conservative. Use a wider spray tip, keep distance, and avoid blasting edges around windows and weep screeds. Too much pressure can erode the finish or drive water behind the stucco, which is the start of bigger problems. For manufacturer guidance on prep and coating basics, BEHR PRO’s guide to prepping and painting stucco is a helpful reference point.
3) Let it dry longer than you think
Hot weather dries the surface fast, but moisture can stay in the wall. Trapped moisture leads to bubbling, peeling, and white salts pushing through fresh paint.
Typical summer drying ranges (always confirm on your product label):
| Prep step | Typical dry time in hot, dry weather | What to watch |
|---|---|---|
| After washing | 24 to 72 hours | Shade slows drying, deep texture holds water |
| Caulk skin time | 30 minutes to 2 hours | Wind and heat speed skinning, don’t paint too soon |
| Stucco patch cure | 24 hours to several days | Thicker patches need more time |
| Primer recoat | 1 to 24 hours | Depends on product and wall temperature |
A simple check: tape a 12-inch square of plastic to the wall for a few hours. If you see condensation, wait. Don’t seal wet stucco with primer.
4) Repair cracks and chips the right way
Hairline cracks are common. They still need attention, because they telegraph through paint.
- Hairline cracks: Use a paintable acrylic elastomeric caulk, tool it in, then feather the edges.
- Small chips and holes: Use a stucco patch, pack it firmly, and match the texture.
- Recurring or wide cracks: Treat them as a warning sign, not a weekend patch (more on that below).
Let repairs cure per the bag or tube. In summer heat, don’t assume faster is better. Fast skinning can hide uncured material underneath.
5) Remove loose paint and lock down chalky surfaces
If old paint is peeling, scrape it until you hit solid edges. Sand the ridge edges lightly so the transition won’t show.
For chalking, do the hand test. If you rub and get a dusty film, you need better cleaning and often a bonding primer. Chalk left behind acts like a weak layer between the wall and your new coating.
6) Mask and protect against wind and overspray
Tape off windows, fixtures, and light boxes. Cover plants and hardscape. In windy Indio afternoons, loose plastic flaps and slaps fresh caulk or primer, so secure it well.
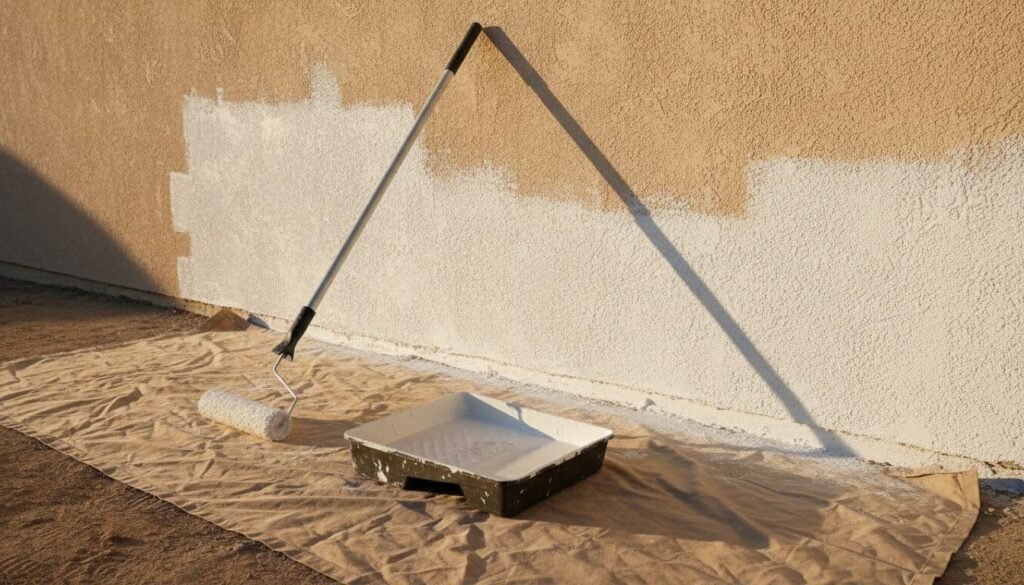
Priming stucco in summer: what actually matters
Primer isn’t optional when you have repairs, bare stucco, or chalk. Use a masonry or bonding primer recommended for stucco, then follow the recoat window on the label.
Hot-weather tips:
- Prime cool walls only. If the stucco is hot to the touch, wait.
- Keep a wet edge. Flash drying can cause lap marks.
- Don’t stretch the primer too thin. You want penetration into pores.
When to call a pro for stucco prep (don’t gamble on these)
Some issues are bigger than prep. Calling a pro early can save a full repaint.
Bring in a qualified painter or stucco contractor if you see:
- Widespread cracking, or cracks wider than about 1/16 inch
- Stair-step cracks near windows or corners (possible movement)
- Hollow, loose stucco that sounds drummy when tapped
- Persistent moisture or staining that keeps returning
- Failing coatings across large areas (peeling sheets, heavy blistering)
These problems often need repair, not just paint.
Printable stucco wall prep checklist (hot Indio summer edition)
Use this as a quick jobsite list.
- Start at sunrise, plan shaded sides first
- Confirm product label limits for temperature and recoat times
- Inspect and mark cracks, chips, chalking, and stains
- Protect plants and mask windows and fixtures
- Clean gently (no aggressive pressure washing)
- Rinse well and allow 24 to 72 hours drying (longer if shaded)
- Patch chips and holes, match texture, let fully cure
- Caulk hairline cracks and gaps; allow proper cure time
- Scrape loose paint, feather edges, and remove dust
- Prime bare stucco, patches, and chalky areas, then recoat on schedule
- Avoid prepping or priming hot, sun-baked walls
- Stop work if wind kicks up dust into wet coatings
Good Prep is Detailed Prep
In Indio summers, the best paint job starts with patient stucco wall prep, not a faster roller. Work early, keep walls cool, clean without damage, and give repairs and primer the time they need.
Follow the product label every step, because recoat windows and temperature limits vary by brand. Do the prep right, and your finish has a real shot at lasting through years of sun, wind, and heat.